Install Print Scout on user workstation
Before installing the first Print Scout:
- Review the Print Scout System requirements
- Read Print Scout Overview
Installing the Print Scout is a two-step process that begins with installing a Print Scout on a single computer. After installation, Print Scout deployment package and configuration settings file must be created. These files will later be used to mass-deploy Print Scouts to multiple machines (user workstations).
- Installing Print Scout on Windows
- Installing Print Scout on macOS
- Installing Print Scout on Linux (only for Secure Print Cloud Connector sites)
- Configuring the Print Scout to use Proxy Server
- Installing the Print Scout in Print Server mode (virtual Print Server mode)
Installing Print Scout on Windows
To install the first Print Scout:
1. When the Print Scout download is complete, unblock and extract the zip file.
2. Once extracted, double-click the PrintScoutInstaller.exe file.
3. Click Next to continue, then read and accept the End User License Agreement.
4. Click Install.
5. When the process is complete, click Finish to exit the installer.
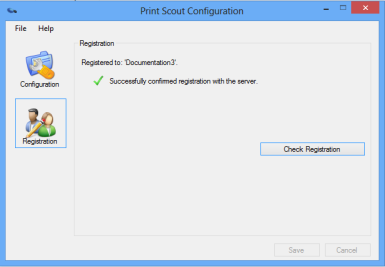
The Print Scout Configuration opens. The Print Scout is automatically registered with the Pharos Cloud server. If the registration is successful, you will see the following message: Successfully confirmed registration with the server.

Installing the Mac Print Scout
1. When the Mac Print Scout installation package download is complete, unblock and extract the zip file.
2. Once extracted, double-click the MacPrintScoutInstaller.pkg file.
3. On the introduction section, click Continue to proceed with the installation.
4. Read and accept the terms and conditions of the End User License Agreement. Click Continue.
5. Click Agree to accept and continue with the installation.
6. Review the installation details. If you do not wish to make changes to the install location, proceed with the installation by clicking Install.
7. If you select Change Install Location..., you will be presented with the Select a Destination screen. Select the appropriate destination, then click Continue.
Administrator privileges are required to continue with the installation. Enter the Admin Name and Password for this Mac workstation, then click Install Software.
8. Once the installation completes, click Close to exit the installer.
The Print Scout Configuration Dialog opens. The Print Scout is automatically registered with Pharos Cloud server. If the registration is successful, you will see the following message: Successfully confirmed registration with the server.
Next Step: Verifying Print Scout Installation